Universal Orchestrator Integration Quickstart
Note: This guide applies to extensions for the Universal Orchestrator (v9+). A guide for building integrations for the Windows Orchestrator is available here.
In this quickstart guide, we will walk through the creation of an integration for the universal orchestrator. At the end of this tutorial we will have implemented a simple extension for the universal orchestrator that you can use as a base for further expanding the capabilities of the Keyfactor Universal Orchestrator. We will be creating a simple implementation of the Inventory job that won’t actually perform an inventory of certificates (yet), but should provide a jumping off point for you to add your own, custom logic and implement additional Job types.
In future iterations of this walkthrough we will dive deeper into a more real-world example of working with certificates.
Tools and frameworks used for the example:
- Visual Studio 2019
- .NET core SDK 3.1
- Windows 10
- Access to the Keyfactor Platform with an account that has orchestrator management permissions.
-
- If necessary, contact your Keyfactor Account Manager for details on how to get a test instance of Keyfactor.
-
- For this tutorial, we will be using Keyfactor v9.2.
NOTE The Universal Orchestrator will not work with versions of the platform prior to 9, however the Windows Orchestrator will work with previous versions of the platform and versions 9+.
Environment Setup
NOTE We will be developing the Universal orchestrator sample extension on a machine running Windows 10 and Visual Studio, but the Universal Orchestrator itself is written with the .NET core portable framework and can run on most common operating systems.
Our development environment will consist of:
- A PC running Windows 10 and Visual Studio
- An instance of the Keyfactor Platform running on a Virtual Machine
-
- This could be also be your cloud-hosted or on-premise instance.
- An orchestrator with sufficient network access to communicate with the platform.
Orchestrator installation
If you have not installed the Universal Orchestrator yet, please follow the steps in the Universal Orchestrator installation guide to install before proceeding.
Platform configuration
In order for the platform to send requests that will activate our extension, we will need to define a corresponding job type. The job type will need to be defined here before the platform will recognize the new orchestrator capability that we will be adding.
Add the new certificate store type
-
Login to your instance of Keyfactor Portal as a user with the Administrator role.
-
Navigate to the administration menu > certificate store types.
- Note that the location of this menu item has changed from Keyfactor Version 8.

- Click the “Add” Button to add a new Cert Store Type:
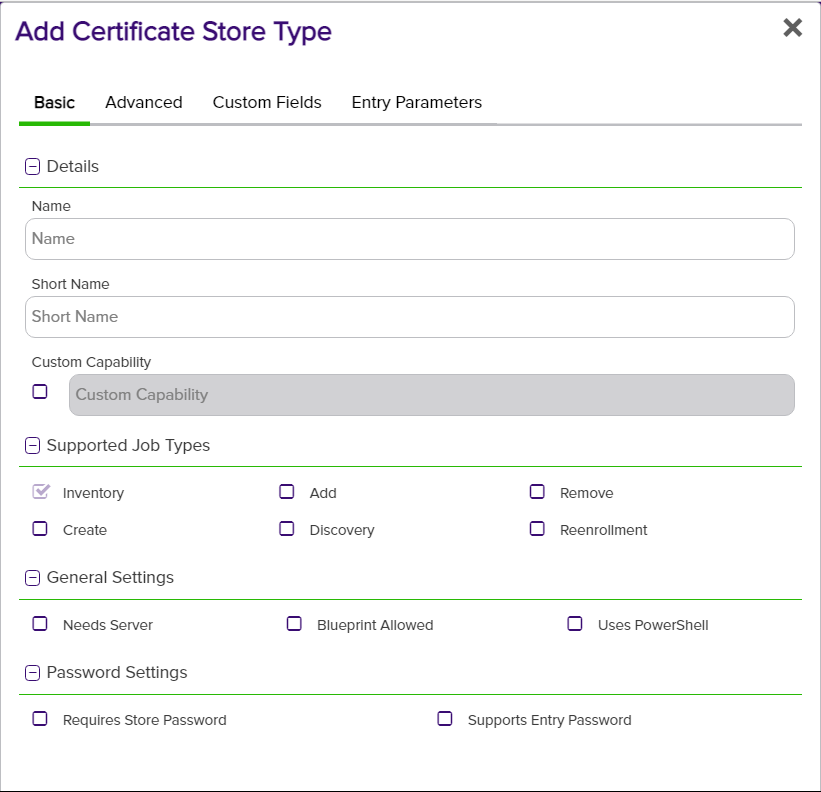
- Enter the following information and click “Save”. If you would like to know what all these fields do in more detail, see the Keyfactor documentation.

- Basic tab:
- Name:
Sample Store Type - Short Name:
SAMPLETYPE - Supported Job Types:
Inventory
- Name:
- Advanced tab:
- leave default settings
- Custom Fields tab:
- Leave default settings
- Entry Parameters tab:
- Leave default settings
Entry Parameters are a new feature introduced in Keyfactor 9 that allow additional information to be associated with individual certificate entries.
For more information on creating and customizing store types, refer to the Keyfactor Platform documentation.
Create the Solution
Now let’s create the project and solution for our extension in Visual Studio.
- Open Visual Studio and select the option to create a new project.
- Select “Class Library” and click “Next”
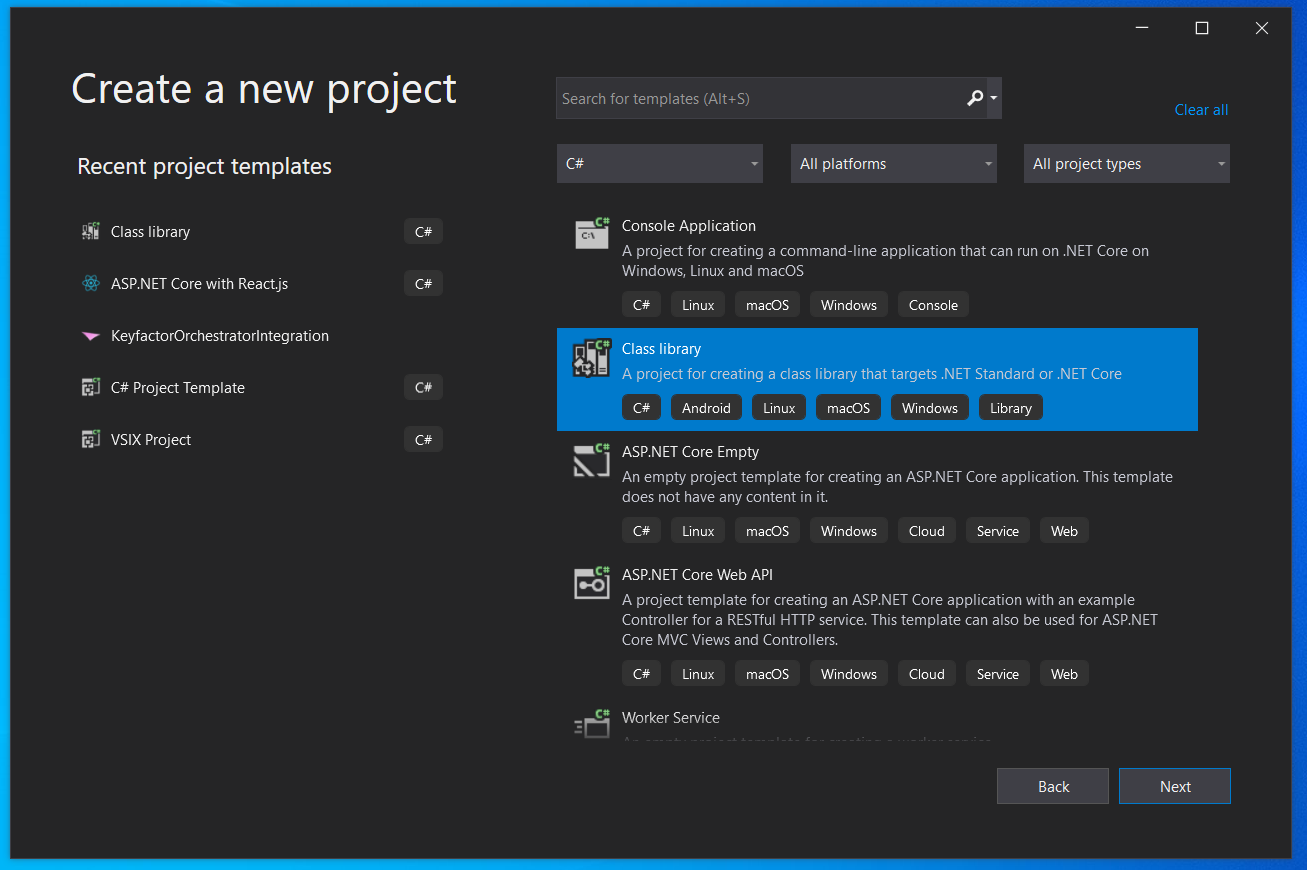
- Provide a name for the project and solution on the next screen. We will call ours UniversalOrchestratorExtensionSample.
- On the final screen, select .NET Core 3.1 as the framework.
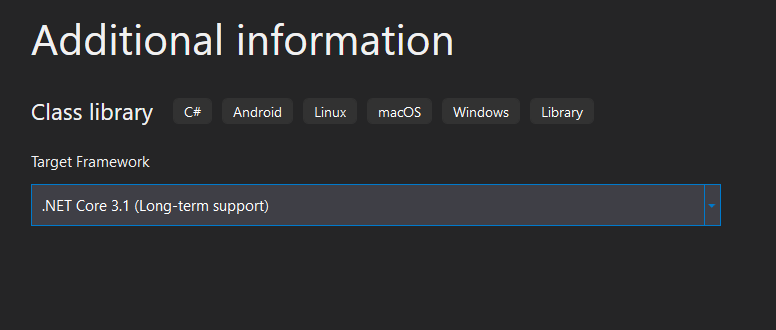
- If you do not see the .NET Core 3.1 option, you may need to install the SDK. It can be found here.
NuGet Packages
There are a a couple Keyfactor NuGet packages that we will use for this example.
Keyfactor.LoggingKeyfactor.Orchestrators.IOrchestratorJobExtensions
These are available on the Keyfactor public NuGet package repository.
You will also need to install NLog and NLog.Extensions.Logging which are available on the public NuGet server.
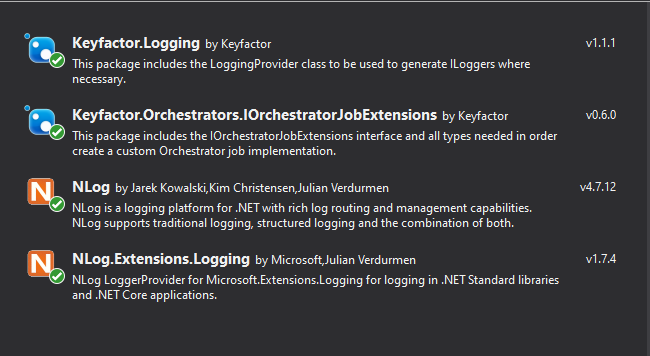
These were the latest versions at the time of writing this. It’s not necessary to match the exact version of the package above
Defining our Jobs
Now that we have our new project created and have added the necessary NuGet packages, let’s create Job classes that will run when the platform requests them for the new store type we created.
For each job that our new store type should support, we will need to create a corresponding Job class instance that encapsulates the functionality. Each job that the orchestrator should support for this store type will need an implementation of the Interface for that job type.
The interfaces are defined in the Keyfactor.Orchestrators.Extensions. namespace.
IInventoryJobExtensionIManagementJobExtensionIReenrollmentJobExtension- etc.
Let’s start by implementing an Inventory job.
The Inventory Job
Now that we have our empty solution, let’s create an Inventory job definition and add some logging.
- Create a new folder in your project called
Jobs. - Create a new class in that folder, and call it
Inventory, and name itInventory.cs. -
- It is not necessary to create the solution folder for the job classes; just an organizational preference.
- Replace the contents of
Inventory.cswith the following:
using System.Collections.Generic;
using Keyfactor.Logging;
using Keyfactor.Orchestrators.Common.Enums;
using Keyfactor.Orchestrators.Extensions;
using Microsoft.Extensions.Logging;

namespace UniversalOrchestratorExtensionSample.Jobs
{
    public class Inventory : IInventoryJobExtension
    {
        // The below property is not necessary for the Universal Orchestrator
        // and will be removed from the interface in a future release.
        public string ExtensionName => string.Empty; // <--

        private readonly ILogger _logger = LogHandler.GetClassLogger<Inventory>();

        public JobResult ProcessJob(InventoryJobConfiguration jobConfiguration, SubmitInventoryUpdate submitInventoryUpdate)
        {
            _logger.MethodEntry();

            _logger.LogInformation($"Calling Invoke with 0 items.");
            bool invokeResult = submitInventoryUpdate.Invoke(new List<CurrentInventoryItem>());

            _logger.MethodExit();
            return new JobResult
            {
                JobHistoryId = jobConfiguration.JobHistoryId,
                Result = invokeResult == true ? OrchestratorJobStatusJobResult.Success : OrchestratorJobStatusJobResult.Failure
            };
        }
    }
}
Code Overview
- This is an Inventory job, so it should implement the
IInventoryJobExtensioninterface. - The `
- The primary entry point of each job is the
ProcessJobmethod. Generally, these need to be implemented with job handling logic for each job type the extension should support. - The first parameter passed to
ProcessJobfrom the Orchestrator to our extension is theInventoryJobConfigurationobject, which can contain details such as folder path, remote access keys and passwords that may be needed by the operation. - Upon completion, the Inventory job should invoke the
SubmitInventoryUpdatecallback that is provided as a parameter toProcessJobfrom the Orchestrator; and should pass the results of the inventory check to the callback.
The inventory job will typically contain the logic for gathering information about certificates in a store. In the above example we are simply logging the request.
The SubmitInventoryUpdate callback returns true if the Orchestrator was successful in transmitting the result to the Keyfactor platform. If it returns false, the Orchestrator had a problem submitting the results. In that case, the Orchestrator logs should contain more details of the error.
The JobResult response should reflect success or failure of the operation, but it is also possible to return a Warning status. These statuses appear next to the job run details in the Keyfactor Portal.
Add the manifest file
In order to register the extension with the orchestrator, we need to create a manifest file that describes our copiled libraries.
- create a new file in the root of your project called
manifest.json. - assuming a project named
UniversalOrchestratorExtensionSample, and a single inventory job,manifest.jsonshould include the following content:
{
  "extensions": {
    "Keyfactor.Orchestrators.Extensions.IOrchestratorJobExtension": {
      "CertStores.SampleStore.Inventory": {
        "assemblypath": "UniversalOrchestratorExtensionSample.dll",
        "TypeFullName": "UniversalOrchestratorExtensionSample.Jobs.Inventory"
      }
    }
  }
}
Considerations:
- An entry for the
Inventoryjob is required. - The manifest file, job type property can also contain
config,pre-scriptandpost-scriptproperties that allow other parameters to be set and consumed when the job runs, and describe scripts that should run before and after your custom code. - assemblypath should be the file name of the compiled library.
- TypeFullName should be the
<namespace>.<class name>of the job.
Build The Solution
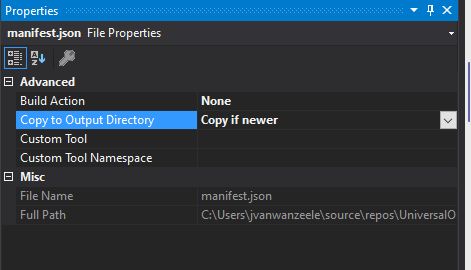
Set the properties of manifest.json to either “Always Copy” or “Copy if Newer” to make sure it’s included in our build output.
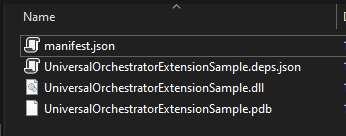
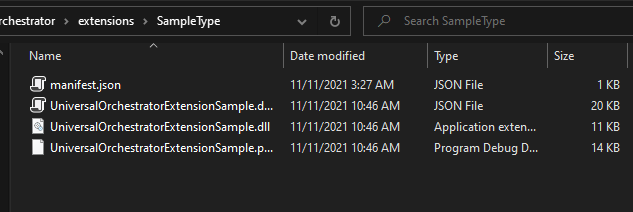
Build the solution with either Debug or Release configuration and navigate to the corresponding output folder. The contents should look something like this:
Register The Extension
The next step is to register the extension with the orchestrator. This is simply done by adding the appropriate files to the extensions folder. The manifest file we created above tells the Orchestrator what jobs are available in our extension.
- Stop the Orchestrator service.
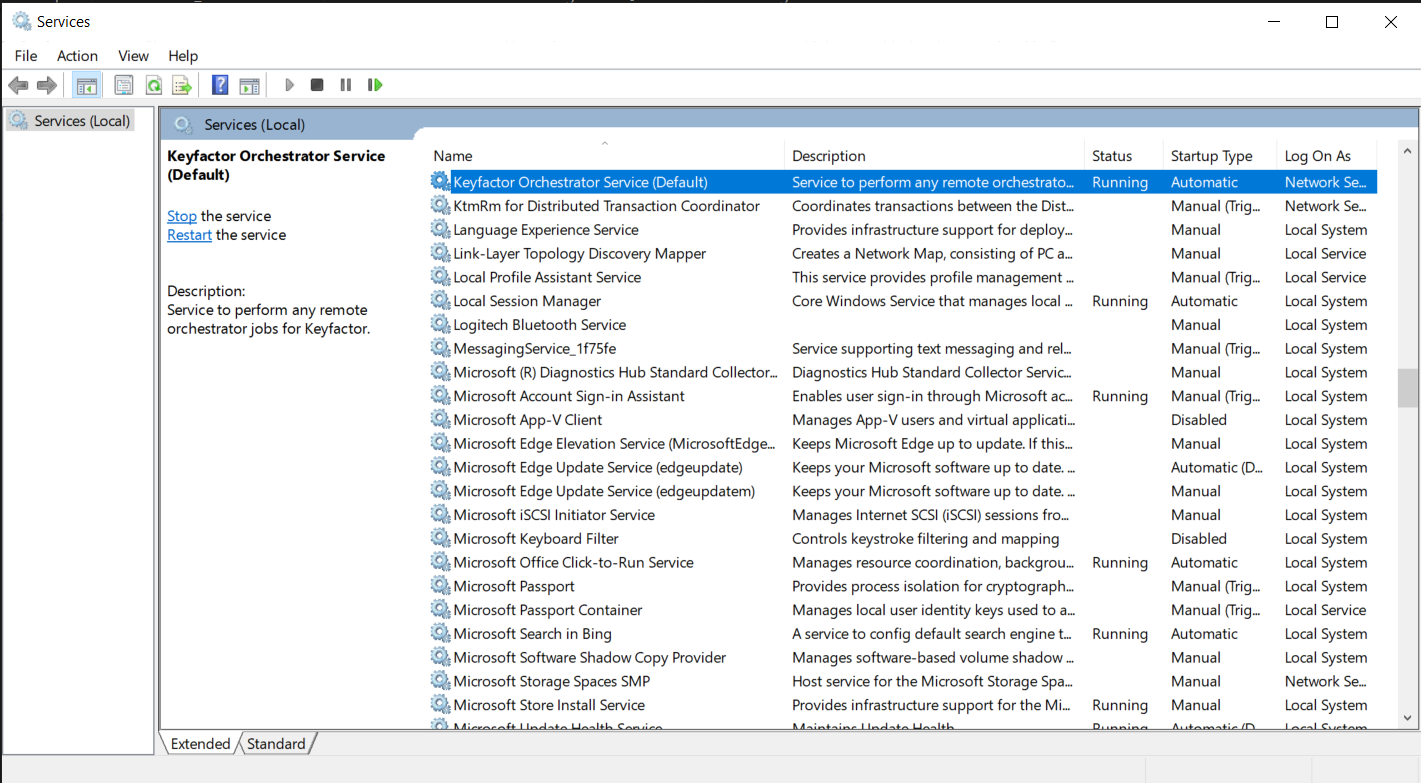 Note: The universal orchestrator service is named Keyfactor Orchestrator Service (default) by default
-
Navigate to the extensions directory under the Universal Orchestrator working directory. By default this is
C:\Program Files\Keyfactor\Keyfactor Orchestrator\extensions.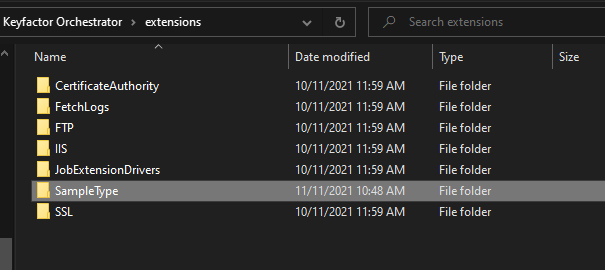
-
Create a folder that corresponds to the extension. The folder name does not need to match to the extension name.
-
Copy the entire contents of the build output above into this folder.
-
Start the Orchestrator service.
Orchestrator Approval
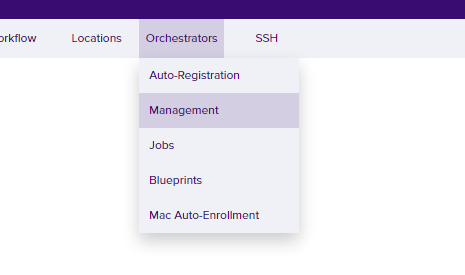
- Log into the Keyfactor portal and Navigate to Orchestrators/Management as shown below.
- Verify that the new capability appears in the Capabilities column.
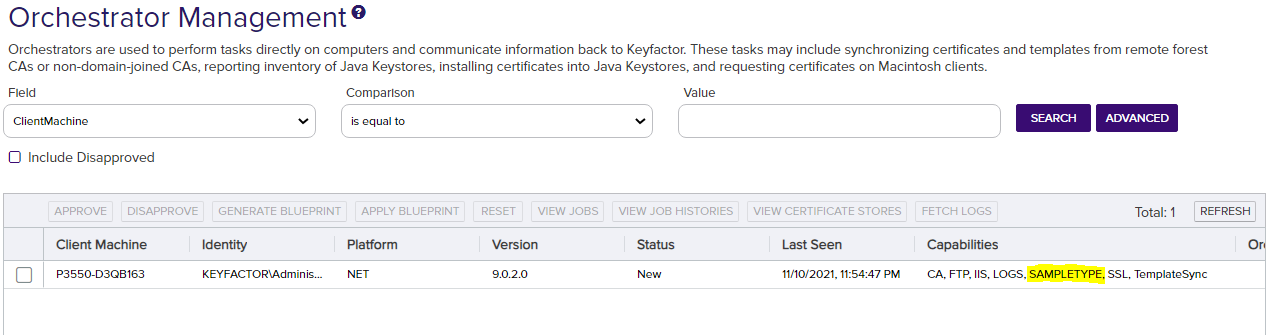
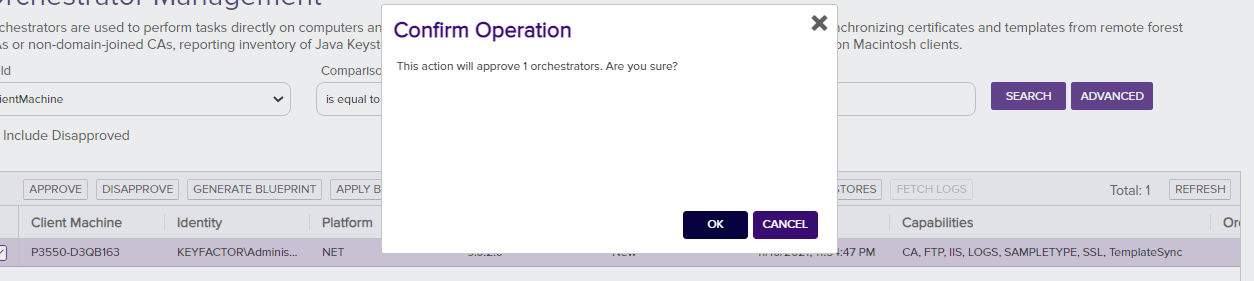
- Approve the Orchestrator. If the orchestrator was previously approved, you will need to re-approve it once the platform picks up the new capability.
Test the Inventory Job
Once approved we can go through the process of adding a new certificate store and kick off the inventory request.
-
To do this, navigate to Locations/Certificate Stores:
-
Click the “Add” button to add a new Cert Store as shown below and you will be presented with the dialog displayed in Step 5.
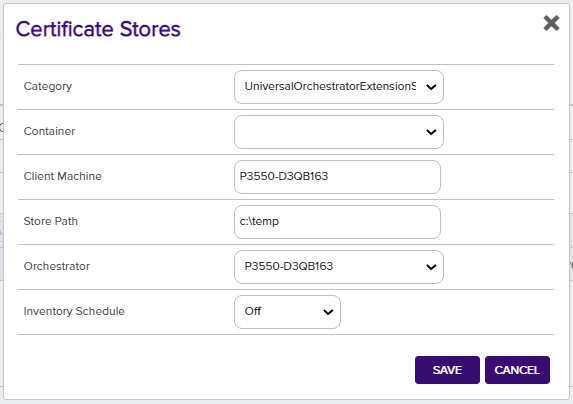
-
Fill in the following values (shown above)
- Category - Select the new cert store type that we created (UniversalOrchestratorExtensionSample).
- Container - In this case, we are not using containers but this is a way to categorize the Cert Stores and gives some ability to perform operations on the Container.
- Client Machine - This is the machine that should be targeted by the operations; in our case, it will be the same machine that’s running the orchestrator.
- Orchestrator - If it’s not already selected; select the orchestrator that we approved.
- Inventory Schedule - This is where we can define the schedule for running the Inventory job. Leave this off for now.
-
After all the fields are filled out click the “Save” button.
Running the Job
Let’s confirm that our new extension is getting executed when we run the Inventory job.
- Back on your development machine, open the Solution for the extension.
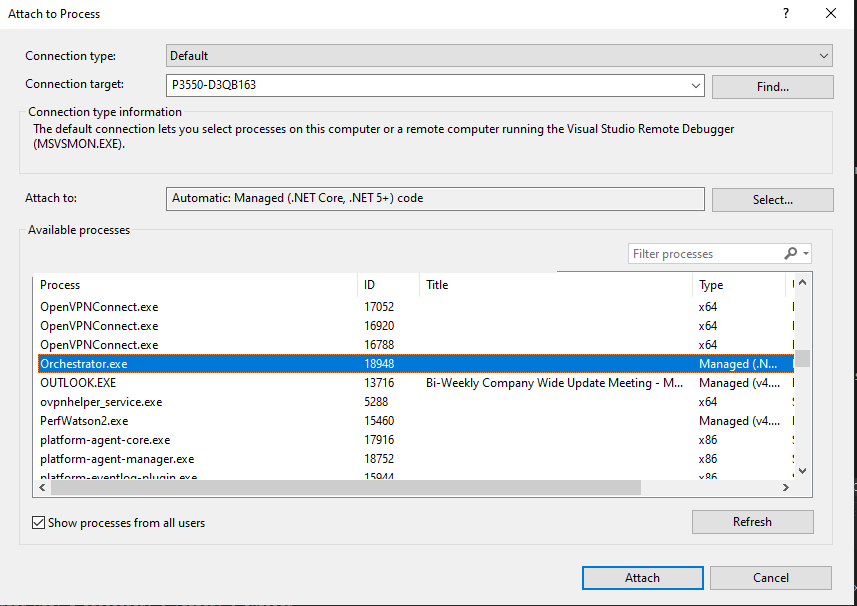
- Go to Debug > Attach to Process in the toolbar.
-
Search for “Orchestrator.exe” and select “Attach”.
-
Add a breakpoint at the first line of
processJobinInventory.cs. -
Go to the Keyfactor Platform and navigate to Locations > Certificate Stores, select the one we created, and click Schedule Inventory.
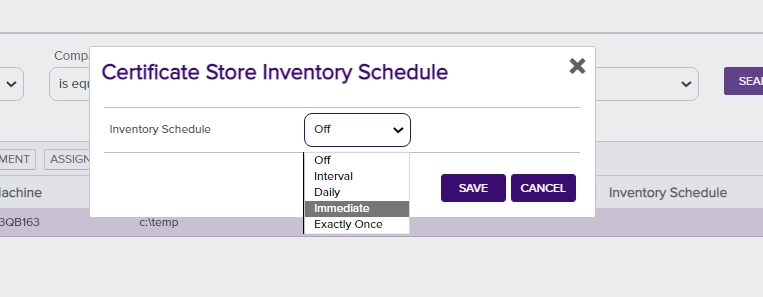
-
Select Interval and then every 2 or 3 minutes.
-
If successful, the breakpoint should be hit once the job is kicked off.
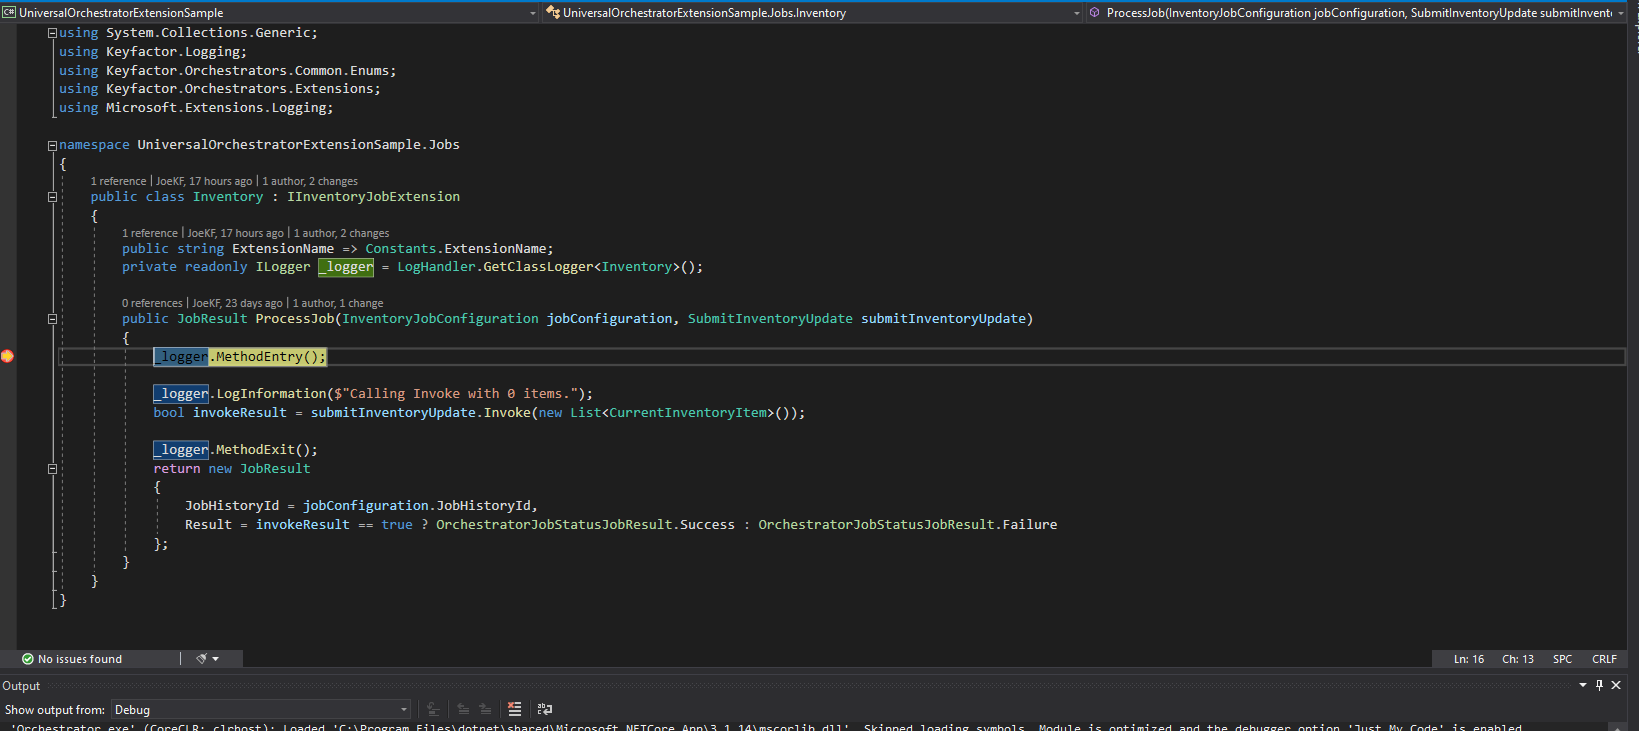
- We can see the values that were passed into the request via the
jobConfigurationparameter.
Viewing the logs
Let’s confirm that our logging is working properly by reviewing the Orchestrator logs.
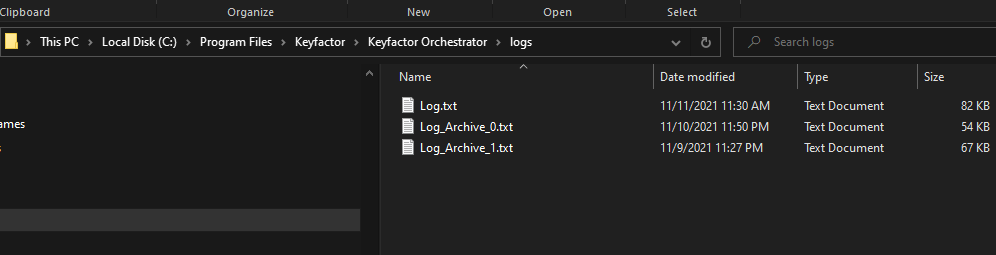
By default, they are located at C:\Program Files\Keyfactor\Keyfactor Orchestrator\logs.
-
Navigate to the logs folder
-
Open the
Log.txtfile and confirm that we can see our log entries.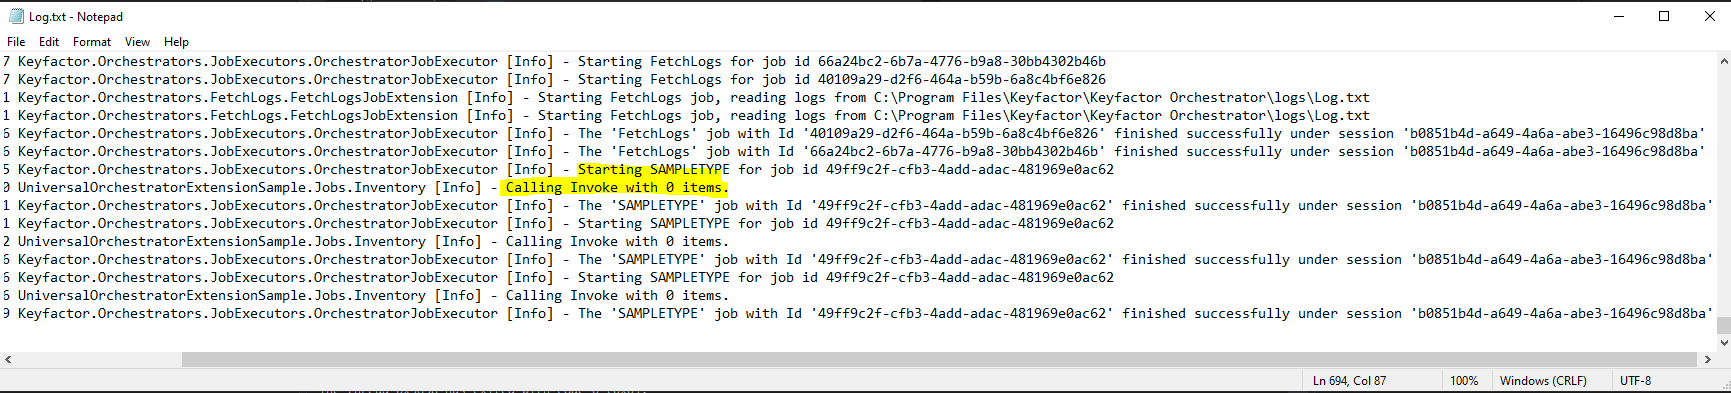
Unit Tests
- We will not be adding unit tests for this walkthrough, but we recommended unit testing the logic when writing an integration for real-world use.
Keyfactor Logs
The log files can also be very useful when debugging. The valid trace levels are Trace, Warn, Info and Error; with Trace providing the most detailed information.. The level can be set for the Universal Orchestrator in the following location:
C:\Program Files\Keyfactor\Keyfactor Orchestrator\configuration\nlog.config
Summary
Congratulations! You have sucessfully built and configured an extension for the Keyfactor Universal Orchestrator.
We hope that you have gained a deeper understanding of the process.
We are always updating this documentation so check back soon for more samples and examples.
The source code for the sample can be found here.